GUIDES
Vancouver Island Map: The 32-Nation Board, the 100-Player Lobby, and Where to Spawn
A decision framework for Vancouver Island, the v0.35 land-heavy map. What the 32-nation, three-unflagged board actually looks like, what the land-driven lobby formula does to its size, how the nation layer and overflow names work, and which side of the island to commit to before the countdown ends.
Direct answer. Vancouver Island is the v0.35 board with the most land and the fewest named players per square mile: 32 nations on 2,012,664 land tiles, and under the new land-driven sizing it rolls a 100-player large lobby (75 medium, 50 small) with 150 in team mode. Commit to the west coast’s deep inlets for defence or the open north shore for aggression, hold one named nation plus its two neighbours, and treat the three unflagged First Nations as neutral ground you must win, not claim. Read the lobby tier first, because a 100-player island is a different game from the compact eight-nation one.
Vancouver Island is the map that lets v0.35’s two biggest mechanical changes meet in one lobby. The first is the nation layer, a board with thirty-two named nations on the main island, twenty-six of them flagged as British Columbia, two flagged as Washington on the American side of the strait, one flagged as Vancouver, and three First Nations entities that carry no flag at all. The second is the land-driven lobby sizing that replaced the flat one-hundred-and-twenty-five cap, which means this is one of the biggest public lobbies the game can now produce. The map is wide, the water is full of inlets and peninsulas, and the board’s geography decides your match before the first unit is built. This guide gives you a repeatable framework for the four decisions the map actually forces: which tier you are dropped into, which side of the island to commit to, which named nation to anchor on, and how to play the three flagless nations that sit in between.
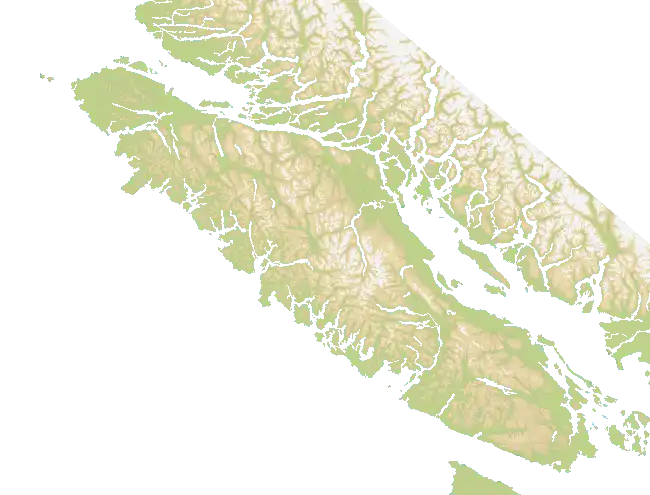
Version boundary: what v0.35’s Vancouver Island actually is
The single most important thing to pin down before you plan a spawn is that Vancouver Island is a v0.35 map and it carries the two v0.35 behaviours that reshape every board it appears on. It shipped in the v0.35.0 formal release on October 16, 2026, and the official release notes describe it in one line as “30+ nations from the Pacific Northwest,” which is the upstream’s own shorthand for a wide, nation-rich coastal board. It is not in the v0.34 stable playlist, so if you are on a stable build the map does not exist for you, and if you are on a hosted lobby a player can still pick the older map set where it never appears. The version boundary matters for two reasons. First, the nation layer on this board is the v0.35 nation system, the one where nations behave like the humans who win, save later, fortify borders, and send small beachhead boats before pushing by land, so the nations on Vancouver Island are not the passive filler of the older builds. Second, the lobby size you get on this map is the v0.35 land-driven size, not the old one-hundred-and-twenty-five clamp, which is the reason a full Vancouver Island lobby can reach a hundred players where the same board would have been pinned to a flat ceiling on stable.
The second boundary to understand is the data. The numbers in this guide come from the
upstream manifest at the v0.35.0 tag, which is the authoritative source for the board’s
shape: a two-thousand-six-hundred by one-thousand-nine-hundred-eighty grid, two million,
twelve thousand, six hundred and sixty-four land tiles on the full
resolution map, and the map4x and map16x entries that are zoom renderings of the same
board, not separate maps. The full-resolution count is the one the lobby formula
consumes. The v0.35.0 release is the floor, and the current release cursor as of the date
of this guide is v0.35.6, so the map has been live for several patch releases. Nothing in
the v0.35.x patches has changed the manifest’s nation count or land figure, which is why
the numbers hold across the patch range, but if a future v0.35 release reworks the map
geometry or the nation list, re-check the manifest before you reuse the spawn logic in
this guide. The boundary is simple to state: on v0.35, this board is wide, nation-rich,
and big; on anything older, it is not there at all.
The lobby size the land formula hands you
Under the v0.35 land-driven sizing the lobby you land in is not a guess and it is not a flat number; it is the output of a small formula applied to the map’s land-tile count, and Vancouver Island’s two million land tiles put it squarely in the largest tier the formula produces. The formula takes the land-tile count, multiplies it by fifty per million tiles, rounds to the nearest multiple of five, and never lets the base fall below five. That base is the map’s largest size tier, and the medium and small tiers are derived from it by multiplying by zero-seventy-five and zero-fifty and rounding each back to the nearest multiple of five. Apply it to two million, twelve thousand, six hundred and sixty-four land tiles and the large tier comes out to one hundred players, the medium tier to seventy-five, and the small tier to fifty. In team mode the game multiplies the FFA tier by one-and-a-half, so the same board rolls one-fifty large, one-thirteen medium, and seventy-five small.
![Lobby tier table for Vancouver Island under v0.35 land-driven sizing.]
| Lobby mode | Large | Medium | Small | Source of the number |
|---|---|---|---|---|
| Free-for-all | 100 | 75 | 50 | 50 per 1M land tiles, rounded to 5 |
| Team | 150 | 113 | 75 | FFA tier x 1.5 |
| Compact map mode | — | — | — | uses 25% of nations (8), not land |
| Hosted lobby | host-set | host-set | host-set | governed by hosting rules, not this formula |
The reason the tier matters more than the player count is that the tier is the shape of the board you are actually dropped into. A one-hundred-player Vancouver Island is a board where every named nation has to absorb a cluster of human players, where the coast is thick with overlapping claims, and where the inlets that defend a spawn are contested from the first minute. A fifty-player version is the same board with half the pressure, where a single named nation can be held by one or two players and the interior stays quiet long enough to build a real economy. A one-fifty team lobby is a different species entirely, because two teams of up to seventy-five have to split the island between them and the fight is for the middle, not for a corner. The practical rule is to read the lobby tier from the lobby list before you commit to a spawn, because the same physical board plays as three different games depending on which tier you are in, and the spawn that is correct in a fifty-player island is often the wrong one in a one-hundred-player one. The compact map mode is the exception to the land rule: it ignores land and uses twenty-five percent of the manifest’s nations instead, which on this board is eight nations, and that is a board so small and so dense that the wide-island logic in the rest of this guide stops applying.
The nation layer: 32 nations, 30 overflow names, three unflagged
The nation layer on Vancouver Island is the part of the board that is easiest to misread, so it is worth stating exactly what is on it and what is not. The manifest carries thirty-two named nations on the main island. Twenty-six of them carry the British Columbia flag, which is the visual and mechanical signature of the board: the majority of the named nations are BC place names, which is why the release notes call it a Pacific-Northwest board. Two carry the Washington flag, Clallam County and San Juan, and they sit on the American side of the Strait of Juan de Fuca, which means the board does not stop at the Canadian border and two of your named neighbours are stateside. One carries the Vancouver flag, and that is the single metro-name nation that anchors the southern tip of the island. Then there are three nations that carry no flag at all: the Kwakwaka’wakw Nation, the Coast Salish Nation, and the Nuu-chah-nulth Nation. These three are visually distinct on the map and in the player list because they render without a flag, and they are the board’s unique feature, the three entities that do not belong to any of the three flag groups and that sit in the interior and along the coast as flagless, neutral-looking powers.
The second thing to state is what the thirty overflow names are and are not. The manifest
also lists thirty additionalNations, all flagged British Columbia, with names such as
Whistler, Tsawwassen, and Ladysmith. These are not active nations in a default public
lobby. They are the overflow pool the engine draws from only when a lobby’s requested
nation count exceeds the thirty-two the manifest defines, and in a standard public
lobby the nation count is matched to the players or capped at the manifest size, so the
overflow names usually do not appear. The release notes’ “30+ nations” line is the
upstream’s own summary of the main-island nations plus this overflow pool, and the
number thirty-two is the count of nations that are actually on the board in a normal
game. The practical consequence is that you should plan your spawn around the thirty-two
named nations, treat the three flagless ones as the ones to watch, and not assume that a
BC overflow name like Whistler is a nation you will see unless the lobby is forced to a
nation count above thirty-two. If you do see one, it is a signal that the lobby is a
custom-nation-count one, and the board is denser than the default, which changes the
spread of your claim and the number of named neighbours you have to account for.
Decision framework: pick your side before the countdown ends
The decision framework on Vancouver Island is a four-step read you run in the lobby before the countdown ends, and it is the same four steps whether you are in a fifty or a hundred-player lobby. The first step is to read the tier. Look at the lobby list and note whether the island is rolling at fifty, seventy-five, one-hundred, or the team variants, because the tier sets the density and the density sets everything that follows. The second step is to read the sides. The island has a deep, inlet-heavy west coast, a more open and exposed north and east shore that faces the strait and the mainland, and an interior of named BC nations that sit between the two. Name the three or four named nations nearest your side and note which of them is flagless, because a flagless nation near your spawn is neutral ground that can be won by anyone and is usually the first target of the player who reads the board. The third step is to read the inlets. The west coast inlets are the board’s defensive geography, the long narrow arms of water that cover a spawn and make a landing expensive, so if you want a defence-first game you anchor on the inlet that protects your named nation and use the water as your first wall. The fourth step is to read the named anchor. Pick one named nation as your anchor, the one you will actually hold, and name the two neighbours on either side of it, because on a wide board the player who knows their two neighbours is the player who is never surprised by a flank, and the player who does not is the one who loses the interior.
The framework has a default and the default is the west coast inlets in a small-to-medium lobby and the open north shore in a large lobby. In a fifty or seventy-five-player island the board is quiet enough that the defensive inlets hold, so you anchor a named BC nation on the west coast, take the inlet in front of it, and expand along the coast into your two named neighbours while the interior stays unclaimed long enough to build. In a one-hundred-player island the west coast is too crowded for a pure defence, because the inlets are contested from the first minute and the defensive bonus of the water is spent keeping your own spawn instead of holding it, so the correct default shifts to the open north shore, where you anchor a named nation on the exposed coast and play an aggression-first game, expanding inland and using the open shore to screen the strait crossings. The flagless nations change the read in both cases, because whichever side you pick, the flagless nation nearest you is the neutral target, and the player who takes it first gets a second economy and a second spawn that the rest of the board then has to contest. The four steps are the whole of the pre-game decision on this board, and the player who runs them in the lobby is the player who knows, before the countdown ends, which side, which inlet, which anchor, and which flagless target they are committing to.
Scenario one: a full 100-player FFA on the west coast
The first scenario is the one that defines the map: a one-hundred-player free-for-all where you landed on the west coast, the default in a smaller lobby but the wrong call here. The assumption is that you are at full density, one hundred players on two million land tiles, and you anchored a named BC nation on the inlet-heavy west coast because it looked defensible. The problem with that call at this density is that the inlet that defends your spawn is now contested by six to eight other players who made the same defensive read, and the water that was your first wall is now a lane that everyone is fighting for. The concrete play is to abandon the pure-defence read in the first three minutes. You hold your named anchor, you take the one inlet that protects it, and you do not try to hold the whole coast, because holding the whole coast at one hundred players means a unit on every inlet and a unit on every inlet is a unit not funding your economy. The numbers that matter here are the two: your anchor nation and the two named neighbours on either side of it. You expand into those two, you claim the port or factory on your side before you commit a unit to the inlet lane, and you keep one screen on the nearest crossing where the American-side Washington nations push. The flagless nation nearest you is the target you take in the midgame, because at one hundred players the flagless nation is the one everyone is eyeing and the player who takes it first gets a second economy that the rest of the board then spends the game contesting. The failure here is the spread: the player who wins the inlet and then spreads along the whole coast gives the other players a free crossing through the thin lane, and the counter is the concentration, which is to keep your units on your two named neighbours and the flagless target and not to send a unit to the far coast unless the far-coast player is the one funding the crossing. The scenario is the whole of the large-lobby west-coast game: hold the anchor, take the nearest flagless target, expand into the two named neighbours, and concentrate instead of spreading. The timing that decides the scenario is the first three minutes, because the inlet you do not take before the other players’ economy starts funding it is the inlet you cannot take at all once the crossing it protects turns into a contested lane. If you are forced to cross the strait early to reach the flagless target, the crossing costs a unit and the time it takes to ferry it, and the player on the far side who pre-funds the crossing lane is the one who charges you that cost twice.
Scenario two: the compact eight-nation board
The second scenario is the one that most players do not expect, because the same physical board can show up in the compact map mode and play as a completely different game. The assumption is that you are in the compact map mode, which ignores the land formula and uses twenty-five percent of the manifest’s nations instead, and on this board that is eight nations. The board is now eight named nations on the same island, which means the wide-island logic stops applying and the game becomes a dense, eight-player contest where every named nation is a neighbour of every other and the interior is claimed from the first minute. The concrete play is the opposite of the wide-board default. You do not anchor a west-coast inlet for defence, because with eight nations the inlets are not defensive, they are just water between two neighbours who are both going to push you. You anchor the named nation with the most named neighbours, the one in the middle of the board, because at eight nations the centre is the economy, the centre is where the ports and factories cluster, and the centre is where the flagless nation sits. The numbers that matter here are small and specific: eight nations, one flagless target, and the two or three named nations that share a border with your anchor. You take the flagless nation first, because at eight nations it is the neutral prize that everyone converges on and the player who takes it gets a second spawn that the seven others then have to fight over. You expand into your two or three named neighbours and you do not spread, because at eight nations the spread is the whole board and there is no far coast to ignore. The failure here is the over-expansion: the player who takes the centre and then pushes into all three neighbours at once is the player who is flanked on two fronts, and the counter is to take the flagless target, hold the centre, and expand into only the two neighbours who are funding their own economy. The scenario is the whole of the compact game: eight nations, take the centre, take the flagless target first, and expand into two neighbours, not three. The compact board is also the one where a wrong first move is hardest to undo, because the moment you are surrounded there is no open water to fall back across; the wide board at least leaves a second coast, while the eight-nation board leaves you the one neighbour you did not expand into, and that is the player who then decides your midgame for you.
Failure modes and opponent counterplay
The failure mode that ends most matches on Vancouver Island is the spread, and it is the same spread on the wide board and the compact board, only at different scales. On the wide board it is the player who wins the inlet or the coast and then spreads units along the whole shore instead of concentrating on the two or three named neighbours and the flagless target, and the counter to that spread is the concentration, which is the reason the decision framework asks you to name your anchor and its two neighbours instead of reading the whole coast. On the compact board it is the player who takes the centre and then pushes into all three neighbours at once and is flanked on two fronts, and the counter is to expand into two neighbours, not three. The spread also fails the economy on both boards, because a unit on the far coast or a third front is a unit not funding your anchor, and the anchor is where the match is decided. The practical fix is the same on both scales: keep the main screen on the named neighbour or the inlet that matters, use the flagless target as the second economy, and do not send a unit to a second or third front unless that front is the one funding the crossing or the push.
The second failure mode is the flagless neglect, which is the player who sees the three flagless nations and treats them as unimportant because they have no flag, when in fact they are the neutral prize on the board and the first target of the player who reads it. The counter to the flagless neglect is the flagless-first rule, which is to name the flagless nation nearest your anchor in the lobby and plan to take it in the midgame, because the flagless nation is the second economy and the second spawn, and the player who takes it first has the board’s most contested prize. The third failure mode is the strait neglect, which is the player who plays the interior and forgets the two Washington-flagged nations on the American side of the strait, and the counter is to keep one screen on the strait crossing, because the Washington nations are the only neighbours who are not BC and they are the only direction you did not read in the framework. The opponent counterplay on this board is the flagless grab, which is the player or team that takes the flagless nation before you can, and the counter to that is the same flagless-first rule run one minute earlier. The three failure modes and the one counterplay are the whole of the map’s tactical content, and the player who can run them is the player who wins the island.
Mode and map adjustments
The mode you are playing changes the Vancouver Island read in a small number of ways, and the map itself changes the mode reading in a few more. The first mode adjustment is the team split. In a team lobby the island is split between two teams, and the decision framework changes from which side you pick to how the team divides the side. In a one-fifty team lobby each team has up to seventy-five players, which is more than the thirty-two named nations, so the team has to assign named nations to players and the fight is for the middle of the island, the strait, and the flagless target. The team framework is the same concentration logic as the FFA, applied to the team’s half of the board: the team anchors a set of named nations, takes the flagless target on its side, and concentrates on the middle instead of spreading along the whole shore. In a smaller team lobby the team has fewer players per named nation, so the team can cover more of its side and the spread failure is less likely.
The second mode adjustment is the nuclear tools. The ports and factories on the coast and the named nations on the interior make the strait and the inlets nuclear targets, and the nuclear reading on this board is the same as on any water map, which is that the crossing is the target and the inlet is the screen. The Vancouver Island version is that the inlet is a long narrow arm of water, which makes a nuke on the inlet more effective than a nuke on open coast, because the nuke destroys the one screen the defender has in that arm. The counter to the nuclear crossing is the second economy, which is the flagless target and the named neighbour, because the nuke destroys the screen on one inlet and the crossing still has to cross the next named nation, so the named nations extend the defence beyond the nuke’s radius. The practical nuclear rule is to keep the flagless target and the named neighbours alive, because the nuke destroys one screen and the named nations stop the crossing.
The third mode adjustment is the Doomsday Clock. The Doomsday Clock on this board is the same as on any map, which is that the under-forty-percent side is fighting to survive the wave, but the Vancouver Island reading is that the under side is usually the side without the flagless target, because the side without the flagless target is the side without the second economy. The Doomsday reading is the same as the concentration reading, which is that the side with the flagless target is the side that can keep expanding to the last economy, so the under side has to force the flagless side to spend units on the screen. The map adjustment is the same as the mode adjustment, because the wide board is the mode on this island, and the mode changes the reading of the three things above, the team split, the nuclear tools, and the Doomsday Clock. The player who can read both the mode and the map is the player who plays the island correctly, and the island is the one that decides the match.
What to take into your next match
The single takeaway from Vancouver Island is that the board is wide and the decision is the side, and the side is decided by the tier. The map is two million land tiles with thirty-two named nations and three flagless ones, and the match is decided by which side of the island you commit to before the countdown ends. The decision framework is the tool, which is to read the tier, read the sides, read the inlets, and read the named anchor, and the scenarios are the two ways the match plays out, the one-hundred-player FFA on the west coast and the compact eight-nation board. The failure modes are the three ways the match is lost, the spread, the flagless neglect, and the strait neglect, and the counterplay is the one way the opponent wins, the flagless grab. The mode and map adjustments are the last piece, which is that the mode changes how the team splits the side and how the nuclear tools and the Doomsday Clock read, and the map changes where the sides, the inlets, and the named anchor are.
For the broader systems this opening feeds into, the lobby-size map-driven guide covers the land formula and the tier table that this guide applies to Vancouver Island, the map strategy guide covers connected land and water networks on any board, the island defense guide covers how to screen a spawn and when a disconnected sea route means you should fall back to land, the population growth guide covers the economy that funds the anchor and the two named neighbours, and the naval stalemate and blockade guide covers how to hold a crossing when the enemy is trying to deny it. Bring those into the same decision and the Vancouver Island opening stops being a guess about which side of the island looks central and becomes a plan about which side, which inlet, which anchor, and which flagless target you are committing to before the countdown ends, which is the only time the whole thing is still in your hands. The board is wide enough that a wrong side is recoverable for a short while, but the inlets make the correction a crossing, and crossings cost time and a unit that you may not be able to afford if you have already burned your early game on a bad start, which is why the players who win on this map are usually the ones who read the tier and the side carefully and committed to a named anchor with a named inlet and a named flagless target, rather than the ones who picked the familiar side by instinct and then had to improvise the crossing.
Related content
Use OpenFront v34.3 costs, troop growth, route payback, and stop signals to choose City, Port, Factory, defense, or a liquid reserve without copying a fixed script.
- OpenFront AFK Teammate Takeover: Absorb a Disconnected Ally for Zero Troop Loss
A Team-mode decision guide for what a teammate's disconnect does to your win/loss position, when absorbing their land is free, when it is a trap, and what the 30-second mark and the ranked 2v2 rules actually change.
Sep 23, 2026
- How Nations Aim Their Nukes: Smarter Targeting, No Wasted Blasts
A strategy guide for the upcoming AI Nation nuke targeting change: Nations now compute how much of a blast hits enemy land before firing (atom 25%, hydrogen 40% minimums), they skip a spot where another player's nuke is already landing, and they never nuke a target that would hit friendly land. What changes in your decision, the coverage gate, the anti-double-nuke rule, the failure mode and the mode/map adjustments.
Oct 8, 2026
- Alliance-Break Timing: When 30 Seconds Is Worth the Trade
Decide whether to break a live alliance now, wait for it to expire, or renew it, using the 30-second traitor window, the 0.5 defense and 0.8 speed debuffs, and the -100/-40 relation drops in OpenFront v0.34.
Sep 30, 2026